InstallationBack to top
You can install the theme one of two ways:
- FTP: Extract the mnd-wp19.zip file and upload the extracted folder to the /wp-content/themes/ folder of your WordPress installation.
- WordPress dashboard: In your admin panel, go to Appearance → Themes and click the Add New button at the top of the page. Then click the Upload button at the top of the page. Choose the mnd-wp19.zip file from your computer and click Install Now.
After installing the theme, you must activate it. In your admin panel, go to Appearance → Themes and hover over the theme's thumbnail. Click the Activate button next to the theme's name.
Tip: To read more about installing themes correctly: WordPress Adding New Themes.
CustomizerBack to top
MND WP19 is customizable via the WordPress customizer. Here, you can change the content’s options, manage your menus, and add widgets to your sidebar. To access the theme customizer, click Appearance → Customize in the WordPress admin menu.
Content Settings
You can use the following HTML tags in all the fields in this section: <em>, <strong>, <a>, <span>, <br>.
- Header Title: The site title to appear on the theme's header. Use the <span> tag for the highlight in the title.
- Header URL: The site URL to appear on the theme's header.
- Footer Credits: By default displays copyright, year, site title, and credits. Mandatory.
- Footer Disclaimer: Post your site disclaimer, terms of use, other relevant info.
- Excerpt & More Link Text: Change the text dislayed by the <!--more--> tag.
- Related Posts Title: Change the title of the related posts box in the single post view.
- Responsive Menu Label: Change the label of the menu in the responsive version.
Layout Options
- Blog Layout: Choose the way the posts will be displayed on the homepage and archives.
- Full-Width Layout: Choose to display or hide the sidebar. Will affect all the posts, pages and archives.
- Sidebar Position: Display the sidebar on the left or right to the posts and pages.
- Posts & Pages Sidebar: Choose to display a different sidebar on posts and pages. Check this, then go to Appearance → Widgets to use the new sidebar.
- Related Posts By: Choose to display the related posts in the single post view by category or tags.
- Hide/Show Elements: Choose to hide or display many theme elements.
Colors
- Global Colors
- Background Color: Change the background color across your entire site.
- Body Text Color: Change the color of the body text across your entire site.
- Accent Color: Change the color of the links, buttons, and other elements.
- Header Colors
- Header Title Text Color: Change the color of site title in the header.
- Highlight Background Color: Change the color of the highlight background color.
- Header URL Text Color: Change the color of the site URL in the header.
- Top Bar Colors
- Top Bar Background Color: Change the background color of the top bar.
- Menu Links Color: Change the color of the menu links. Affects both the main menu and the social icons.
- Responsive Menu Border Color: Change the color of the border between the menu items in the responsive version.
- Footer Colors
- Footer Background Color: Change the background color of the footer section.
- Copyright Text Color: Change the color of site info text in the footer.
- Disclaimer Text Color: Change the color of site disclaimer text in the footer.
- Disclaimer Top Border Color: Change the color of border between the copyright and disclaimer in the footer.
Other Sections
- MND Plugins: If you have any of the MND plugins activated (Filmography, Press Library, Video Vault, Fan Sidebar), MND WP19 will show you options like: display prev/next navigation, categories and tags, related and popular videos.
- Header Image: Choose your header image by uploading a new photo, or selecting between the ones in your library.
- Background Image: Choose a background image to use in place of the color specified in the Colors section above.
WordPress' Default Sections
- Site Identity: You can edit the site title, tagline, and icon that will be displayed on the browsers' top bar.
- Logo: Upload a logo from your computer; it will appear in place of the header title.
- Menus: You can manage your menus in this panel, including setting their location.
- Widgets: You can configure your widgets in this panel and see your changes live.
- Static Front Page: Set a page to be your homepage and/or a location for your posts.
- Additional CSS: Add your custom CSS here to overwrite/add to the theme styling.
Tip: To read more about using the WordPress customizer: WordPress Appearance Customize Screen.
MenusBack to top
MND WP19 supports 2 custom menus: a primary menu, plus a menu for your social profiles.
Primary Menu
- WordPress menus can be found under Appearance → Menus.
- If you don’t have a menu already, click create a new menu to create one.
- On the left side of the Menu page, choose the pages/posts/links/categories to add to your menu and click Add to Menu.
- Now that you have the menu created, you need to assign it to the Primary Menu in the Theme Locations section.
- Save the menu when finished.
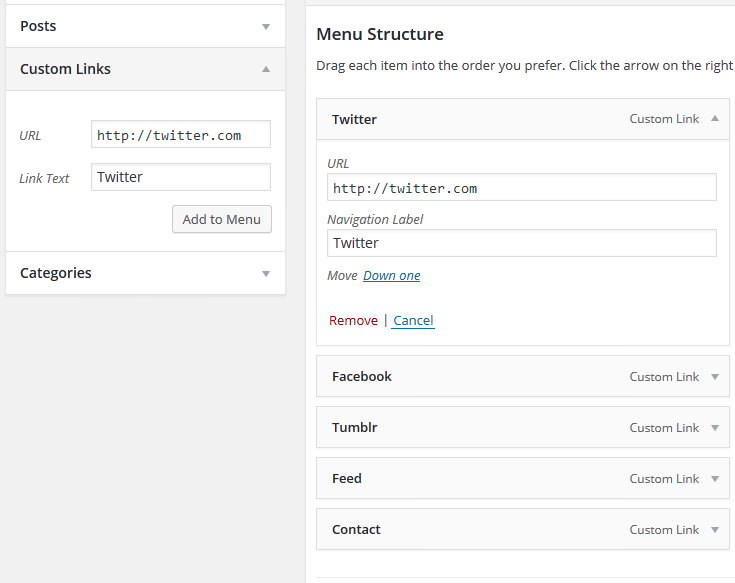
Social Icons Menu
- To add a social icon menu, go to Appearance → Menus.
- If you don’t have a menu already, click create a new menu to create one.
- On the left side of the Menu page, click the Custom Links menu item to add to your social links.
- Add the URL for each of your social profiles and a label for the link. The theme will detect which site you are linking to and display a matching graphic.
- Icons are supported for the following sites: Facebook, Flickr, Google+, Instagram, Pinterest, Spotify, Tumblr, Twitter, Vimeo, VK, Yahoo, Youtube, WordPress.com, Email (URLs with /contact/, /contact or mailto:), RSS Feed (URLs with rss, feed=, /feed/ or /feed). - Now that you have the menu created, you need to assign it to the Social Icons Menu in the Theme Locations section.
- Save the menu when finished.
Tip: To read more about using the WordPress menus: WordPress Menu User Guide.
WidgetsBack to top
Sidebar Widgets
MND WP19 displays widgets in the sidebar of posts and pages. Go to Appearance → Widgets and add widgets to the Sidebar Widgets panel.
Footer Widgets
MND WP19 supports a second widget area in the footer, where you can display a full-width feed of your Instagram account, or of photos from your gallery:
- Instagram Feed
This is done with the help of the free WordPress plugin WP Instagram Widget:
- Install and activate the plugin, go to Appearance → Widgets and add the Instagram widget to the Footer Widgets panel.
- For best results, it's recommended to set the number of photos displayed to 8. - Gallery Feed
This is done with the help of the free Coppermine plugin CPMFetch (account needed):
- Install and activate the plugin in your gallery following the instruction at the link above.
- Go to Appearance → Widgets and add a text widget to the Footer Widgets panel.
- Add the PHP code to the text widget and save it.
- IMPORTANT: Make sure you have installed a WP plugin like PHP Code Widget, otherwise the PHP code will not work in widgets.
Header Widgets
MND WP19 supports a third widget area in the header, where you can display 2 widgets such as recent posts (custom styling), latest photos, welcome message and more.
You can also use the WP Instagram Widget plugin to display an Instagram feed (see more info above). For best results, it's recommended to set the number of photos displayed to 6.
Front Page Widgets
MND WP19 supports a widgets area on the front page, enabling you to create a magazine style layout with the help of 3 custom widgets:
- MND Front Page Posts (Style 1)
This widget is suitable for displaying the last 5 posts of your site/selected category in a horizontal layout. It displays the first post in the left, with a big featured image and the post excerpt, followed by the next 4 in the right, with smaller featured images and no post excerpt.
- MND Front Page Posts (Style 2)
This widget is suitable for displaying the last 4 posts of your site/selected category in a horizontal layout. It displays the smaller featured image but no post excerpt.
- MND Front Page Posts (Style 3)
This widget is suitable for displaying 4 featured posts, selected by their IDs, in a horizontal layout. It displays the smaller featured image but no post excerpt.
How to create a separate page with all your posts: check out this tutorial (text and video).
Tip: To read more about using the WordPress widgets: WordPress Widgets.
Image SizesBack to top
- Custom logo image is unlimited wide by 25px high.
- Header image is unlimited wide by 500px high.
- Featured images are 750px wide by 300px high (1125px wide by 450px high recommended).
Was this article helpful?
That’s Great!
Thank you for your feedback
Sorry! We couldn't be helpful
Thank you for your feedback
Feedback sent
We appreciate your effort and will try to fix the article